Hamulec jednoręczny Trionic
Tekst wstępu
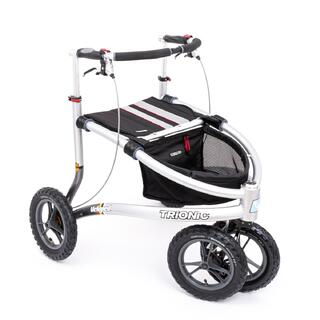
 1 Montaż: System hamulca jednoręcznego Trionic (zdjęcia przedstawiają prawą stronę)
1. Zamontuj dźwignię hamulca na rękojeści (jak najdalej z przodu).
2. Odkręć śruby (2x 4 szt.) mocujące osłonę hamulca prawego i lewego.
3. Przymocuj krótką linkę hamulcową do hamulca po tej samej stronie co dźwignia hamulca.
4. Upewnij się, że śruba końcówki linki jest skierowana na zewnątrz (w kierunku koła).
5. Poprowadź dłuższy kabel hamulcowy przez ramę (pomiędzy górną i dolną rurą ramy).
6. Przymocuj dłuższy kabel hamulcowy do hamulca znajdującego się po przeciwnej stronie dźwigni hamulca.
7. Wytnij mały otwór (2x) przez materiał koszyka w każdym tylnym dolnym rogu (patrz CZERWONE kółka na rysunku).
8. Przymocuj dłuższy przewód hamulcowy do koszyka za pomocą dwóch opasek zaciskowych.
9. Ponownie zamontuj 2 osłony hamulców, używając 2 opasek zaciskowych z otworem Ø5 mm do 2 górnych śrub (strona prawa i lewa).
10. Przełóż jedną z osi szybkozamykacza koła (Ø12 mm) przez pętlę opaski zaciskowej i mocno zaciśnij opaskę zaciskową wokół osi (zapewnia ona odpowiednie napięcie, zapobiegając ocieraniu się linki o oponę, ale bez wypychania linki hamulcowej z właściwego kierunku).
11. Linki hamulcowe po stronie prawej i lewej można regulować indywidualnie, albo za pomocą śrub regulacyjnych umieszczonych przy hamulcu, albo za pomocą śrub regulacyjnych przymocowanych do powielacza liniowego.
12. Upewnij się, że hamulec postojowy blokuje koło całkowicie.
 2 Centrowanie hamulca
1. Odkręć śrubę zacisku hamulcowego o 3-4 obroty (przez otwór w osłonie hamulca).
2. Pociągnij za dźwignię hamulca i mocno ją przytrzymaj.
3. Przytrzymując mocno dźwignię hamulca, ponownie dokręć śrubę kołnierza hamulca.
4. Sprawdź, czy koło obraca się swobodnie i nie ociera między hamulcem a piastą hamulca.
Jeśli mają Państwo jakiekolwiek pytania, prosimy o kontakt z naszym kierownikiem produktu Stefanem Kindbergiem; +46-8-522 100 52.